How To Install A Semi-Privacy Hampton Style PVC Picket Fencing Panel
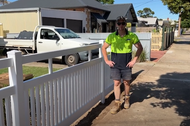
Posted by Lee Benson on 25th Aug 2025
If you’ve been considering upgrading your front fence or looking for a way to bring more privacy into your home without compromising on style, semi-privacy PVC picket fencing may be the perfect solution.
The semi-privacy PVC fencing design gives you enough coverage to feel secure while still allowing light and airflow through, making outdoor areas feel inviting rather than closed off. With its clean white finish and low-maintenance durability, it brings a timeless Hamptons-style look to your property, and the composite material of PVC fencing means your fencing won’t rot, fade or warp like timber. It’s a practical and stylish choice for families or anyone wanting both protection and Hampton-style garden elegance in their backyard.
Alongside this, with minimal parts that slot together, they’re easy to install with only a moderate level of handy skills. With a little preparation, the right tools and some patience, you’ll have a professional-looking fence installed in no time. While we’re a fencing supplier, the team at Outback Fencing are also experienced at installing all kinds of fencing.
Today, we’ll walk you through the entire installation process of semi-privacy Hampton-style PVC picket fencing, from setting up your string line to putting in the final fence panel. Check out the video to watch or keep reading for the written guide.
Materials and Tools You’ll Need
When you order semi-privacy PVC fencing with us, you’ll receive everything needed to build a strong and stylish fence:
- Premium PVC panels and rails
- Reinforced posts with internal aluminium support
- Stainless steel fasteners and fittings
- Decorative post caps for a polished finish
Now, for the tools, you’ll need these:
- String line
- 2 pegs for the string line
- Double-handed shovel, standard shovel or post hole digger
- Spirit level
- Measuring tape
- PVC fencing tag tool
- Angle grinder
- Rubber mallet
- Quick-set concrete (for securing posts)
Step 1: Plan and Set Up Your String Line
Proper planning is key to anything building-related – and if you want a straight and even fence, measurements and mapping are necessary. Before you start digging, you need to know exactly where your fence will go, and we do this by running what we call a string line to mark out the fenceline. The string line represents where the bottom of your fence rail will sit. Place the string line away from obstructions like garden plants or concrete sections. Here’s how to install your string line:
- Drive a peg into the ground at each end of your fence line.
- Run a string line between them. This will be your guide.
- Make sure it’s level using either a laser level (best for long runs) or a 1200mm spirit level (fine for shorter spans).
Step 2: Mark Out Your Post Spacings
Once the string line is set, it’s time to measure where each post will go.
- Standard spacing for our PVC semi-privacy fencing is 2450mm centre-to-centre.
- Use a spacer stick cut to 2450mm to mark out hole positions along your fence line.
- Spray paint or mark the ground where each post will be.
Using this method with the spacer ensures consistent spacing and saves you from measuring every time.
Step 3: Dig Your Post Holes
Now for the hard work – digging. As the string line is where the bottom of the rail will go, you need to measure the length between the bottom of the post and the bottom of the rail so you know how far down the post should go into the ground.
While we understand post-hole diggers can be expensive to rent and hard to come by, if you have access to one, it will make this step much easier and faster. If not, don’t worry, you can get the same result with a shovel. If you have a double-handed shovel – even better, you’ll protect your back in the process.
- Each hole should be 250–300mm wide and about 700mm deep.
- Watch out for roots (hopefully you avoid hitting one like us!) or rocks
Now, you want to make sure your posts and holes are prepared to be inserted so that the posts are aligned perfectly with the string line height. If you have the same semi-privacy fence as us in the demo, it will be 1250mm from the top of the post to where the bottom of the rail will sit. Measure from the top and put a small dot with a marker at that length.
Step 4: Set Your Fence Posts
With your holes dug, it’s time to concrete in the posts and set them. There are two main ways below – if you have two people, it’s a lot easier, but if you’re doing it alone, the second method has got you covered. Make sure the 1-way PVC posts are inserted on the ends, and the 2-way PVC posts are in between the ends.
1. Two-person method
- One person places and holds the post in the hole.
- The other person places the spacer between the centre of the previous post or hole and the centre of the current hole. The centre of the post should be placed at the end of the spacer.
- Ensure the post is level in both directions.
- Pour concrete around the post, checking that your string line mark is lined up with your string line – you may need to pull it up slightly. When pouring the concrete, you can move the post around in the hole to make sure you get concrete into all sides, and then realign the post at the end.
2. One-person method
- Pour some water into the hole.
- Add two-thirds of a bag of rapid-set concrete.
- Drop the post in, letting its weight settle it into place.
- Place the spacer between the two holes to check the centre of the post is aligned to the end of the spacer.
- Check alignment with the string line and level.
Step 5: Install the Fence Panels
Once your posts are set (ideally, wait a day, but at least 30–60 minutes for rapid set), it’s time to install the panels.
1. Start with the bottom rail first – you’ll know it’s the bottom because it has an aluminium insert inside
- Check inside the rail for any pickets packed in for shipping.
- Slot the rail into one of the posts and push it all the way through until it stops.
- Move to the post on the other end and slot the rail into the post until it clicks in.
- Slide the aluminium insert out of the rail and into the post on both ends.
- Slot the bottom rail into place.
2. Insert the pickets
- Start with the shorter ones, leaving the two longer pickets aside.
- Locate the middle rail and place it upside down next to the bottom rail. Where the two openings are on the middle rail is where the two longer pickets will go.
- Slot each of the smaller pickets into the bottom rail.
3. Install the middle rail
- You now want to install the middle rail, starting with attaching the top of the pickets to the bottom of the middle rail – this part can be fiddly.
- Line up the pickets, then push and wiggle the middle rail until everything clicks into place.
- Then, you can slot the sides of the middle rail into the posts at both ends like you did with the bottom rail.
- Finally, install the two longer pickets, inserting them from the holes above the middle rail all the way down to the bottom rail.
4. Install the top rail
- Install the top rail, starting with slotting the side of the rail into one post.
- Once one side of the top rail is in the post, place the first picket into the opening of the top rail, and then the second picket.
- Finally, insert the second side of the top rail into the post of the other end.
Step 6: Adjust Panels and Cut to Fit
At the end of your fence line, you’ll probably need to cut a panel to fit the last section. Depending on how long this section is, it’s likely you’ll want a picket in this section to continue a cohesive look to the fence.
Here’s how to do it:
- Measure how much you’ll need to cut off to get the picket in the middle of the fence. You’ll need to do some maths to work out how to cut a long enough piece that centres one of the pickets. Once you’ve found this length, cut it off one of the sides of all three rails with an angle grinder. Make sure the rails also have 20mm on each side extra to slot into the posts. Alternatively, to keep the same distance from the picket to the post, just cut one end off (given you’ve measured the length of the last section plus 40mm), which will give you the same look as the rest of the panels.
- On the cut rail section, you can use our PVC fencing tag tool to crimp the end of the rail so it doesn't slot out of place. Or, you can insert a screw into the top rail from above before you add your post caps.
- Use builder’s glue or silicone to secure rails if needed.
Step 7: Add Post Caps and Tidy Up
Once all your panels are in:
- Glue on the semi-privacy post caps to finish the look.
- Clean up any offcuts and tools. If you want to give the whole fence a clean after installing, check out our blog on how to clean and maintain a PVC fence.
- Step back and admire your brand-new semi-privacy PVC fence.
Packing Up
And there you have it – a durable, low-maintenance semi-privacy PVC fence that looks great and will go on to boost the value of your property. You can use it for fencing your backyard or creating a boundary for your property. This type of fencing is stylish, strong and built to last in Aussie conditions. White PVC fencing, especially with the semi-privacy elegance, goes with many common garden design styles, or you can even stay on theme with elements like a Hampton style PVC planter boxes, lots of greenery and florals and stone finishes.
If you’ve got any questions or if you’d like us to supply your fence, contact the team at Outback Fencing. We’ll help you get the job done right and find the right materials for a beautiful, long-lasting fence.