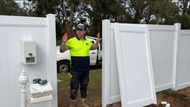
How to Install a Full Privacy PVC Single Gate
Posted by Lee Benson on 4th Jul 2025
PVC is quickly growing into one of the most popular fencing styles across Australia and other parts of the world that also experience the extreme ends of the climate. PVC (polyvinyl chloride) has many draw cards responsible for this, but is particularly renowned for being one of the best fencing styles for hot weather conditions, its resistance to water and affordable construction. It also looks elegant, with many aesthetic comparisons drawn between PVC and traditional timber fencing. Finally, it’s also loved for its ease of maintenance and installation, and today we’re going to show you just how simple it is to install PVC gates. And maximising all the fantastic benefits of PVC fencing and gates, the quality of the installation matters.
Gates are often a key part of full-privacy fencing because many homeowners want privacy on their property boundary and utilise a new fence to boost their family’s privacy. Access then depends on a strong and functional gate.
With a bit of preparation and patience, you can achieve a clean, professional-looking installation that offers both functionality and security. This video and the guide below will walk you through how to install a 1000mm wide full privacy PVC gate using standard TrueClose hinges and a lockable latch system – by following these instructions, you will ensure your installation is strong, straight and secure.
Tools and Materials You’ll Need
Before you start, gather the necessary tools and parts. In terms of materials, you can find all of the full privacy PVC gate and fence panels, latches, posts and accessories on our PVC Full Privacy Fencing page. Most latch and hinge kits will already come with the required screws, just check the product description before you purchase to confirm. Here’s everything you might need:
Materials:
- 1000mm wide full privacy PVC gate (pre-made)
- 1-way PVC posts or an existing post structure
- Hinge and lockable latch kit (Lokk Latch Deluxe)
- Screws (usually included in kits)
- Spacer blocks or packers (to prop the gate)
Tools:
- Drill
- Drill bits (10mm–12mm, depending on the latch system)
- Screwdriver or drill driver
- Measuring tape
- Level or square
- Pencil or marker
- Saw, angle grinder, or file (for adjustments)
Step 1: Measure and Set Your Gate Opening
The first and most important step is ensuring your 1-way PVC post spacing is correct – your gate needs to sit flush with your posts, so as long as this is spaced correctly, it will prepare you for a smooth installation.
The gate panel is manufactured at exactly 1000mm wide, so you’ll need to factor in space for the latch and hinge clearances. A good rule of thumb is to allow 20mm on each side.
Ideal total post-to-post spacing:
1000mm (gate width) + 20mm (hinge clearance) + 20mm (latch clearance) = 1040mm
Use a tape measure to confirm your opening is set correctly between the inside faces of the gate posts. If you’re installing new posts, now’s the time to concrete them in place and ensure they’re level and plumb.
Step 2: Plan Hinge Placement and Pre-Drill
Your PVC full privacy gate contains internal aluminium reinforcements for added structural strength. These are typically located near the top and bottom sections of the gate. That’s where your hinges should go so that they’re installed securely on the most durable part of the gate.
When choosing your hinges, we have black and white available. Choose black for an eccentric contrast, or white for a more traditional and cohesive look. White latches, hinges and panels also create one of the top fencing styles for contemporary homes.
Here’s how to position and mark the hinge placement:
- Mark about 100mm–150mm from the top and bottom of the gate.
- Check where the internal supports are located and align the hinges just under the bottom rail.
- Hold the hinge against the posts, mark screw locations and pre-drill small pilot holes to avoid splitting the PVC.
- Use the heavy-duty self-closing hinges included in your kit – they’re specifically designed to support the weight of PVC gates.
Step 3: Attach Hinges to the Gate
With your pilot holes marked and drilled:
- Secure the hinges to the gate using the provided screws.
- Be firm but cautious not to overtighten – you want a snug fit without deforming the PVC surface.
- If your hinges have cover caps, leave them off until everything is mounted and tested.
Once the gate hinges are in place, gather a few spare screws in your pocket, you’ll need them handy when attaching the gate to the post.
Step 4: Hang the Gate
Now it’s time to mount the gate to the post. This part can be tricky if you’re working alone, as you need to lift the entire weight of the gate before the hinges are installed into the posts. If you can handle and brace the gate properly alone, it should be manageable, but we recommend seeking a second person for support. If you are going to it alone, use your foot, spacer blocks or a packer to lift and hold the gate while you find the right placement.
Now, align the gate’s top rail with your existing fence panel or desired height. While holding it steady, screw the hinges into the post like you did for the gate. Check that the gate is level with a leveller, adjust as needed and make sure the gate swings freely without dragging. PVC material makes one of the most durable fencing and gate styles, but a tight or uneven installation can shorten its lifespan.
Once you’re satisfied with the position, snap on any included hinge covers for a cleaner look. Also, if there is any raised soil or land that inhibits the gate moving smoothly, remove it. Remember, you also want to maintain level ground around the gate as part of the art of functional landscaping – making sure everyone can move safely and freely through the barrier.
Step 5: Drill for the Latch
Now for the locking system. Firstly, it’s worth cleaning the area of the post where the latch will go, this is because once the latch is installed, you won’t have access to this location, so doing it now will make it much easier to clean and maintain your PVC fence in the future. Using a drill template, you want to screw a pilot hole (you just want to mark a mark in the post really). To do this:
- Place the template on the post.
- Mark your first hole at the appropriate height – roughly in line with the top of the template in line with the bottom of the gate’s top rail for a balanced look.
- Using the marked hole, use a marker pen to mark the same height on the side of the post. Then, using a leveller, use the marker pen to mark the other side of the post.
- Using the template again for the opposite side, mark another pilot hole based on the marker pen’s height.
- Now, use a 10–12mm drill bit (check your kit instructions) to drill through both pilot holes on both sides of the post. Check the instructions of your kit to confirm which size drill holes you need to create.
- Drill carefully and avoid angling the bit – keeping the holes straight ensures smooth latch operation. You can then rub the marker pen marks off the post.
Note that if the hole is too small or slightly off-centre, it may cause the locking spindle to bind or stick. You want just enough space for the latch mechanism to move freely without wobbling.
Step 6: Fit the Lock Mechanism
With the holes drilled, it’s time to install the latch. In this step, we can't stress the importance of accurate levelling and barrel length enough, because it will make all the difference between a gate that looks like a home job and a professional finish that will boost the value of your rural property. Here’s how to install the lock mechanism accurately:
- Decide which direction the gate will open.
- Insert the latch body and determine which side the locking mechanism goes on (most have an indicator for left/right). Once you’re happy with the placement, push the body in, and it will click into place. Then insert the black lock barrel into the body and slow the system through the two holes created in the post.
- The barrel needs to sit flush to the end of the post. If it sticks out too far, the latch won’t engage, and if it’s too recessed, the mechanism won’t unlock the gate from the opposite side. So once it’s placed in, mark the edge of the post length on the barrel and cut the excess off with an angle grinder.
- Then push the lock barrel through the post and into the latch body, making sure it clicks fully into place. Check that the lock system works. If not, you may need to cut more of the barrel off.
- Once you’re happy with the lock mechanism, drill the small silver screws provided into the post to secure the latch faceplate.
Step 7: Install the Latch Catch
With the latch working, the final step is to attach the latch catch to the receiving post.
- Align it horizontally with the latch.
- Use a level or your eye to match it to the latch arm height.
- Secure it by drilling in the provided screws through the lock catch and into the gate.
- Double-check that the latch slides into place and that the lock engages fully.
If your PVC post doesn’t have internal aluminium where the catch needs to go, you may need to use plastic wall plugs or toggle bolts for a secure hold.
Final Checks
Ideally, you would have checked everything lines and operates smoothly after each step. But just to make double-sure of it’s integrity before packing up – doing so will ensure your PVC barrier will remain one of the best low-maintenance fencing options.
- Open and close the gate several times to ensure smooth movement.
- Lock and unlock the latch from both sides with the key.
- Check for binding or stiffness – adjust or trim as needed.
- Ensure all screws are tight but not over-torqued.
- Test that the latch stays secure when the gate is pushed or pulled.
Once you’ve double-checked the strength and motion of the gate, you’re all set with a durable and high-quality fence that improves your home’s street appeal, lasts you a very long time and looks stunning all year round. Gates and fences have different installation steps, so if you’re wondering how to install a full-privacy PVC fence, head to our blog to find a specific guide on that. If you need help before or during your installation or want to ask us any questions about PVC fencing and gates, please contact us today.


